The Cauldron – A random dungeon generator (Part 2)
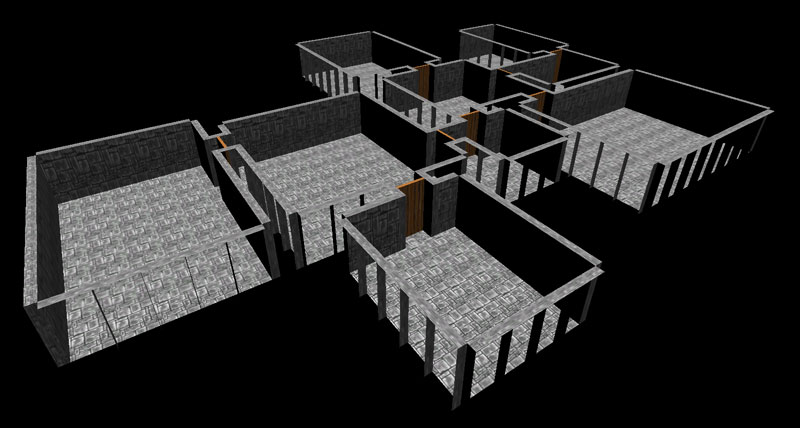
As I continue to scratch the itch compelling me to make a randomly generated dungeon, I’ve pushed this system far enough to make random rooms & corridors connected by doors.
The entire system is based on 1 meter square floor tiles along with wall panels at and door tiles with a foot print of 1 unit square. The door units are cobbled together starting with a floor tile and a slab to represent a door, with some wall units attached which simply and inelegantly overlap the walls nearest to it.
What Happened? How’d you do it?
When we left off with this saga I had roughly generated random room sizes and found random start points for new rooms. The code that created the rooms created them by rows from the start point. This worked well, though this pattern was aligned to the world coordinates. More often than not, the room was simply building over the room it came from.
This wasn’t ideal. If I was going to build the room from a start point, I would also need to affect the orientation of the room before we built it.
So I stopped the blind frontal assault, sat down and rethought my whole approach.
The first thing I did was throw out the BigGem assets, as much as I loved them. They were unique enough that I found myself hampered by their details. I would like to return to them once the system is working, but for now, I needed some very simple building blocks to test with. So – I created some very basic shapes for testing. I made a floor quad and a door, both with their own box collider. The door, I placed as a child in the middle of a floor tile. Popping into Photoshop, I whipped up some very very basic textures.
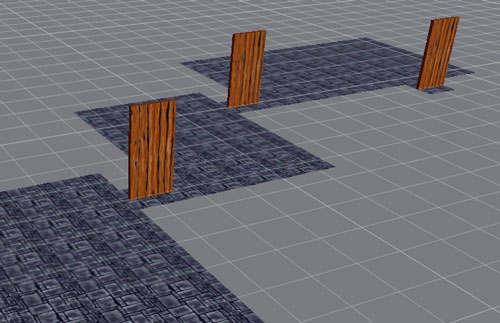 The next step was to change my approach from finding the exit to the last built room, adding a door, then trying to build a new room at that location, to something new.
The something new was to build the new room at origin, then move it into the new proposed location and test the location using collision detection. If the new room collided with anything, then I would recycle the room.
I could still continue building the rooms using total area, or total number of square tiles, and then, using the width of the room, build the room by rows using one line of code.
I chose, however, to use a simple “nested for loop” to build the x & y coordinates instead:
for (int x = 0; x < width; x++) {
  for (int y = 0; y < height; y++) {
    // Build the room by using floor tiles
  }
}
This allowed for a few things… Primarily, it meant that I didn’t have to actually test around the tiles with physics to see if any given tile was an edge tile. I could simply look at the width and height values to find this information. If either the x or y were min or max, it was an edge. If this were true for two of those values then it was a corner. If this were true for three, then it was the end of a narrow corridor. Simples!
I stored this information directly into the floor tile class on the floor quad as “isEdge”. The direction(s) were also stored on the tile in a list for ease of use later in the build process.
The Snake eats Duck
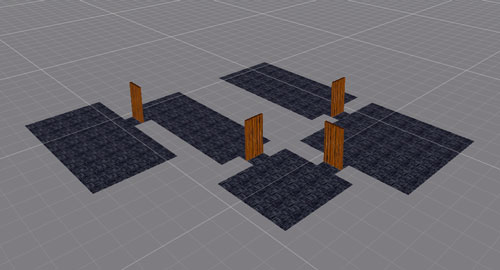 This next phase I called “The Snake”.
With each room, I created an “exit door” when the room was placed and confirmed. With each new room, I calculated a random possible “entry door” along the side of the new room that was aligned, and could join up, with the previous room. I moved the room to it’s position and tested the area to see if there was anything occupying the space. If not, the room was confirmed. If there was a collision, I recycled the room. This worked well enough, but – as the name of this section suggests – with only one entry door and one new exit door per room, all of the rooms simply snaked along, one after the other. This didn’t feel like a very “real” choice of layout.
I needed another way to find my exit door.
Here is the point where I throw away the last remnant of Duck’s script. It was a lot like dropping that booster pack once the rocket was into low orbit. A good starting place, but I now need to move under our own power. I can’t lay down the floor tiles and then build the walls afterwards, which is the basis of Duck’s script.
What I need to do is pick a random wall – any wall – in the current level and see if I could build from it.
So – I changed the way I approached my room.
The Level/Room Hierarchy
I had been using a “level” object that stored information about the level, with the thought that there could be a potential list of “levels”, each with their own unique parameters.
I now added to this the “room” object. The level now kept track of a list of the complete and approved “rooms”. This helped facilitate the recycling process when the entire level was destroyed and regenerated. I now built the room as a complete unit; floors and walls. In the future, I could imagine this step also including the build of the ceiling. With this system, as well, it would help completing all the other details in these room as I will be able to run thought all the rooms in the level and add lighting, props, features… all by pulling them from the rooms list.
With this new room, I would push the floor tiles and the wall tiles to separate lists on the room. I would also push all of the walls to the master wall list on the level. In the future, I could qualify the walls I push, and only push the wall segments I want as available as a door space… Imagine building a pit where none of the walls should be doors, or a staircase, where they should only be at the ends or perhaps on landings, rather than randomly along any wall piece. I then used this master list of walls to select a proposed “exit door” location. This means the proposed door could be anywhere in the level. At this point any wall unit could become a door.
First I would build the floor from a random min/max value with the “nested for loop” I showed above. Using the information in the floor tiles – the “isEdge” and the wall direction, I would build the walls around every “isEdge” tile in “room.floorTiles” list. Next I would rotate the walls to face in towards the tile.
To place the room, I would pick a random wall tile from all of the available walls in the level and make this a proposed “exit door”. This proposed door was tested to see if there was empty space in front of it for a door tile. If there wasn’t, the system looped back to select a new random wall tile as a new door candidate. If there was space, I would select a random wall in the new room on the side facing the proposed door. Moving the room into position by looking at the two proposed doors, I would do a quick collider check to see if there was anything occupying the space where the room wanted to go. If yes, the room gets recycled and the entire process all the way back to the door choice starts again. If nothing is in the way, then, yay! The room gets confirmed and we loop through the entire process again until we reach our maximum room count. And the level is done.
One possible optimization would be to not recycle to room, but to pick and try new locations for the room until either the room found a place to fit, or the process timed out, but this level of optimization hasn’t proved necessary.![]()
Corridors
The next phase was to add corridors.
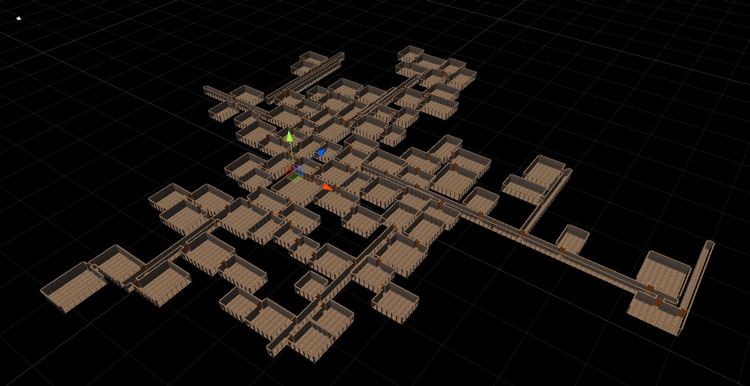
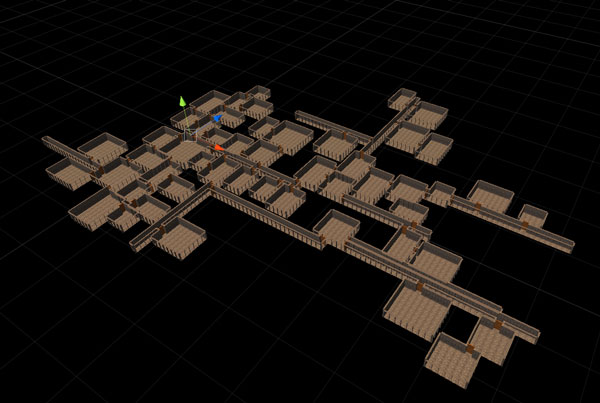
I added variables for weighting the choice of room type, a randomiser, and a switch to build two different styles of rooms: “rooms” and “corridors”. Corridors had one extra parameter to work with when building them, which was alignment: was the corridor horizontal or vertical? But other than that, it was just another room with a slightly different recipe. With width and height values, both room types could be built with the same code I was already using.
Off the grid
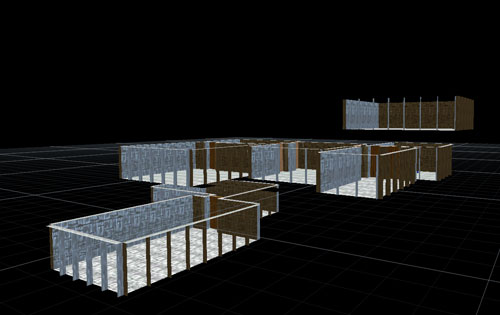 I did some basic experiments, and discovered that the code did what I was hoping it would do. It was independent of the starting grid plane.
This was great to see, even though it was what I was expecting. This means I will be able to make simple recipes for rooms like stairs, pits and other height independent items. As long as I push only what I want as a viable “exit wall” that can be used for a door somewhere in the recipe, when the system uses that “exit wall” as a proposed door, the system will build new rooms on that level.
Some statistics
I can build a 1oo rooms in about 1 second if I don’t watch the build and use pooling. I am sure I can improve my pooling, as the current code is pretty shaky. If I don’t use pooling, I can build 100 rooms in about 2 seconds. If I watch the build, it takes 8 -12 seconds to build 100 rooms. This varies a lot depending on parameters like how many corridors I’m trying to build vs. how many rooms. The editor needs to refresh a frame for each room, as well, so 100 rooms will require at least 100 frames. As this system is not optimized for rendering, by the time the level is finished with 100 rooms, there are over 50k tris, over 100k verts, and more than 10k draw calls all visible from my current camera position, so the frame rate slows to a frightening 10-15 frames per second. This will need some attention.
Next?
Well, there is a long way to go before I’m walking around inside The Cauldron hacking at monsters, but I feel like I have made firm headway.
Having put a first person controller in the space, there are some serious problems with the scale I have chosen. I may double the size of the tiles and move to 2 unit square tiles with 4 unit tall walls.
I’ll need to look at combining meshes and colliders and what-not for optimized rendering… as it is currently set up, the frame rate of looking at the entire dungeon – with just walls and floors, it very very low while still in the editor.
I would like to get more room recipes or prefabs worked out, especially ones that defy the origin grid plane: stairs, pits, tunnels, vaults…
I would like to add ceiling tiles to the mix.
I would like to see if I can minimize the haphazard feel with more rules for how to build rooms and where to place them.
The first rule I would like to experiment with is forcing exit doors on the system. Not only will this be necessary for rooms like the staircase, but it could improve the feel of rooms like the corridor. Corridors often lead to nowhere. In many cases, even with their large contribution to the wall pool, many don’t have any doors beyond the one where it originally was connected, or if they do, they are only a few and the end of the corridor pushes off into no where… Why did the minions build this corridor if it had no destination? I would like to at least be able to force a door at one end on the system, if not both. If I build a staircase, it would be good to force a room to be at the bottom.
Post-processing a room after is has been confirmed might solve this. If I make a long corridor, perhaps it needs a post-process where some, if not all, of the walls are tested for room placement, preventing long halls of nothing to nowhere. Maybe this is the place to include collapsed sections at the ends?
I would like to find a way to prevent two parallel corridors. This just doesn’t make sense if the space is not some actual Cretan Labyrinth.
It might also be nice to look at different door sizes and styles…
But one step at a time!
It’s working. I have a random level generator that is fairly simple, contained in one script that’s only a few hundred lines long!

13 Comments
Sorrien
about 10 years ago ReplySo, what became of this project? "It's working" feels a little anti-climactic. Could you make a third post detailing how you solved those other issues that plagued the second version, and maybe a picture or two of what it looks like fully working? A lot of people are struggling with those last few problems, and need help with that more so than anything else.
Adam
about 10 years ago ReplySadly, this is the state of the project. I have not had a chance to do much more with it. My time is being sucked up primarily with weekly broadcasts for Unity Technologies Live Training (http://unity3d.com/learn/live-training/) and digging out from under all of the things that piled up while prepping and attending Unite 14 this year. I will add more posts when I get the chance to do another sprint. If you have any specific sticking points, please post here and I'll see what I can do to help. If things get too complicated for blog post comments, I can make a section on The Ant Ranch forum to talk about this.
Shawn Irwin
about 10 years ago ReplyI went through this process using Python in the Blender Game Engine, and created a level generator that uses the snake to randomly wander through the level creating tunnels, and every so often make a room. It seems to work good that way, but I will need to change a few things to make it transition between levels. You can find the whole source on my website under the game menu.
Adam
about 10 years ago ReplyInteresting! I hadn't thought of using the technique for tunnels, but it does make sense. This makes me wonder how one would deal with branching, loop backs and reconnecting...
Lee
about 10 years ago ReplyHi Adam, Great post with some good insight, a shame you haven't managed to further the project. I for one would love to see some snippets of code for how the more taxing areas of the process were approached. Obviously nobody expects you to offer a complete random dungeon generator, but some example code showing how you dealt with overlapping, model placement, and the grid (or not the grid as it were towards the end) would be hugely appreciated :)
Adam
about 10 years ago ReplyI probably won't go back and edit any of the posts to add code. If I add code, it will be in a future post about new material. Most of the code I've used isn't really production code, but more proof of concept code, so I'm a bit reluctant to post it as is. It's not very "best practice". Are there any particular bits you are stuck on? I was hoping to make the flow of logic clear enough so that people could write their own code by following the logic flow.
Lee
about 10 years ago ReplyMy problem has always been 2-fold: How to create the "grid" and instantiate according to it, and how to identify edges/check if is an "edge piece". From the logic used there, I imagine I could figure out how to check for passageways, impossible dungeons and the like.
Adam
about 10 years ago ReplyFinding edge tiles ... I can think of two quick ways to do it. One is, when laying out a room in columns and rows, you can check if x or y is the min or max value. If so, it's an edge tile, and if it's both it's a corner. The other method is what I'm using currently, which is just simply lay them down and then do a collider check. If there are colliders all the way around then it's not an edge tile; if there are not, then it's an edge.
Adam
about 10 years ago ReplyMaking a grid, in my case, was as easy as using whole numbers based on the world coordinate system. I start at (0,0,0) and move outwards, creating each tile in regular intervals. I'm not using the method of filling a grid or 2D array with values and then creating the world based on the array. I'm using a method where I instantiate game objects into the game world directly. Personally, I don't want a grid.
Lee
about 10 years agoSo you place a tile, then from that place the next tile (I suppose from a list of possible tiles) and so on until you have a dungeon of the specified size? Makes a lot more sense now, thanks.
Adam
about 10 years ago ReplyIt's probably worth going back and re-reading this second instalment. What I'm going, actually is creating a room in isolation, laying out the tiles in an even manner based on the random room size. Say, I get a 3x5 room, I start at origin, layout tiles using a for loop, incrementing each row by 1 tile width, and the when I reach the end of the row, going back and laying out another row starting at origin plus one tile along the column's axis. Once I've created by room of 3x5, I try to place it in the game world by moving it into location based on the "door" location. If the collision test is clean, I keep the room and instantiate it. If it fails, and some part of the room collides with another room, I delete it and try again.
Adam
about 10 years ago ReplyHere is a video I made back then. Odd. I had thought I had embedded it, but I guess I hadn't. https://www.youtube.com/watch?v=NVTGr3ffxNg